


Project PDF Lily Pads These flowers are super easy...
The Project PDF Flower Boxes Class Description We will...
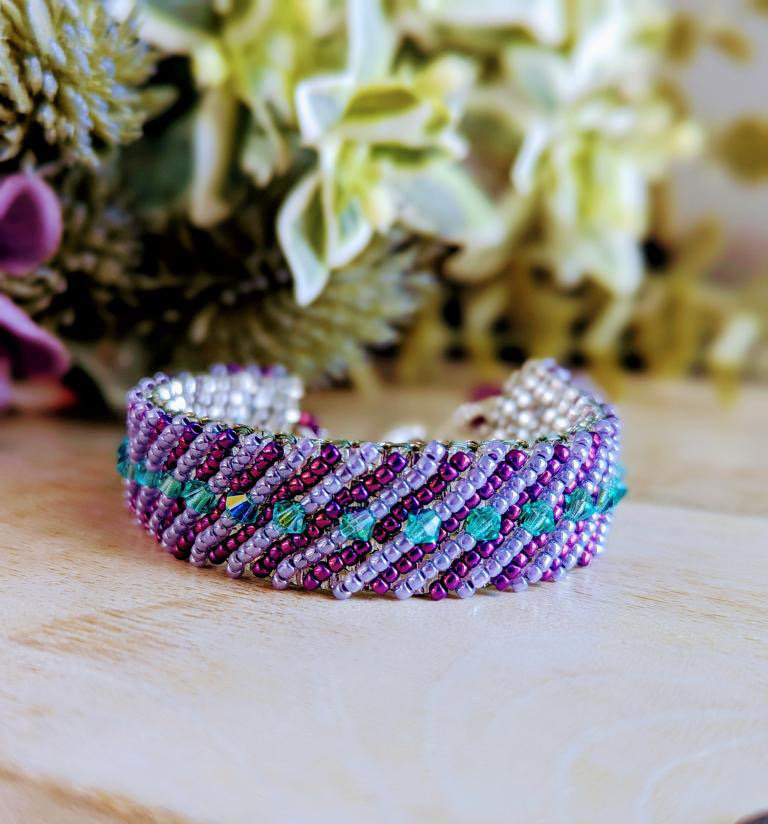
The Project PDF Embellished Square Stitch Bracelets Part 2...
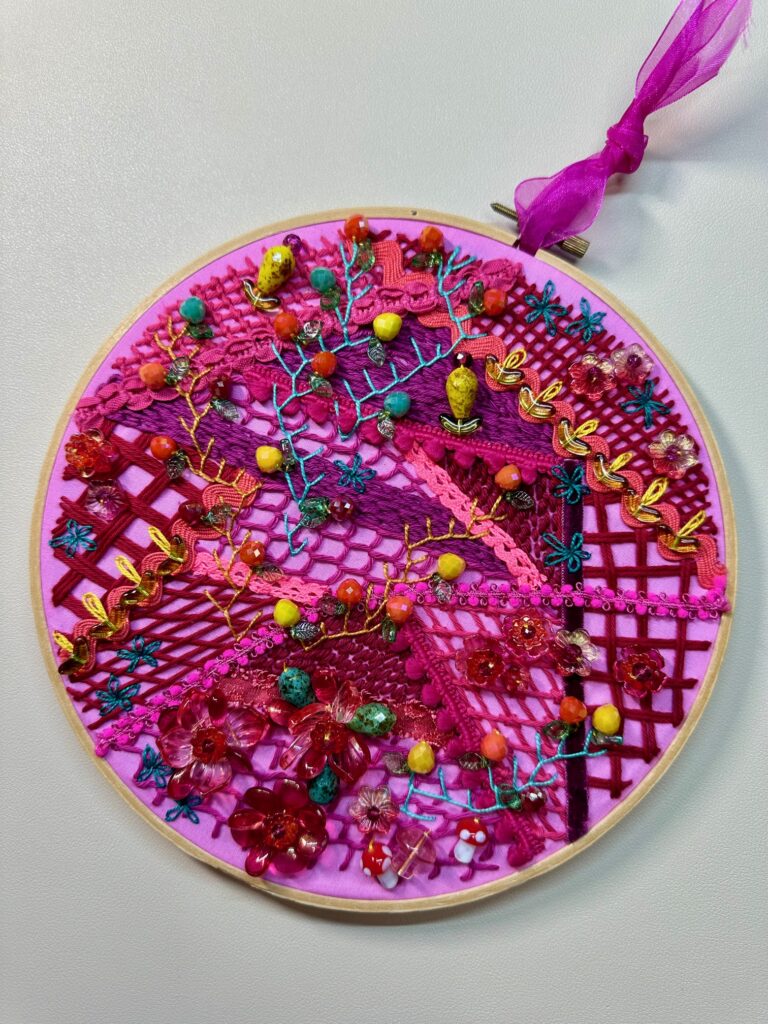
Download the PDF: Floral Crazy Quilt Embroidery Stitch Guide...
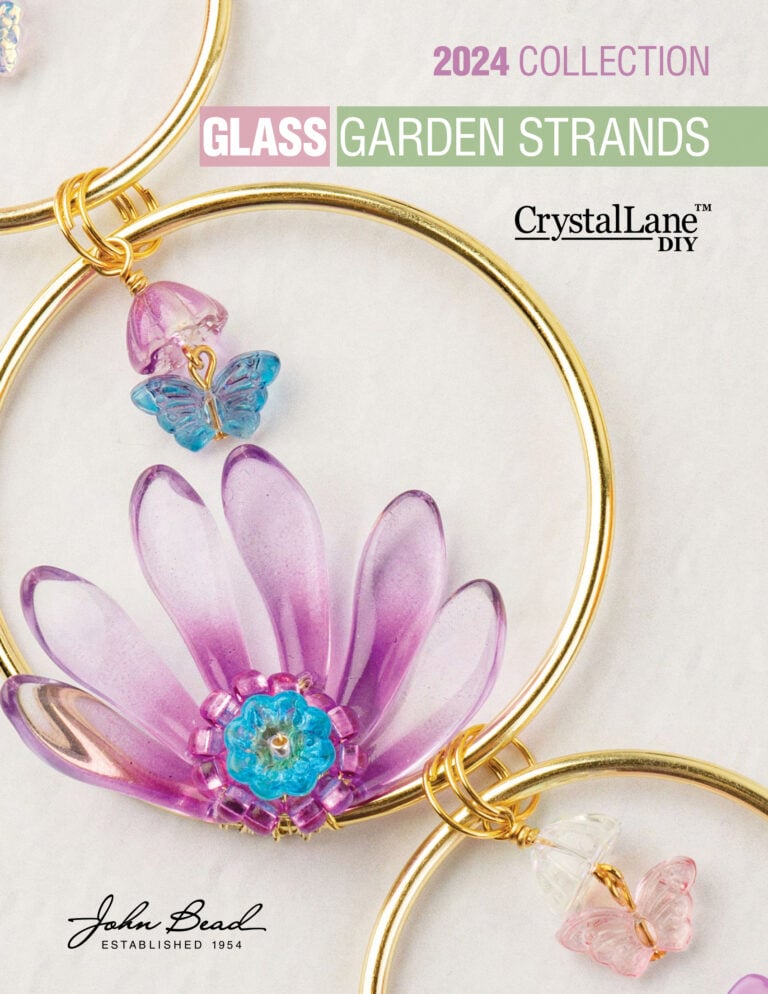
Collection PDF 2024-Sales-Sheet-Crystal-Lane-Garden Strands Our 2024 special planogram featuring...

Project PDF is here Gentleman’s-style Gentleman’s Style Bracelets TECHNIQUE:...
The Project PDF Creating a Base for Embellished Bracelets...
The Project PDF Trinity Knot Class Description Here is...

Project PDF is here Simple-tassel Adorn yourself with a...
2023 was another amazing year for FREE online beading...
The Project PDF Chasing Rainbows Class Description In this...
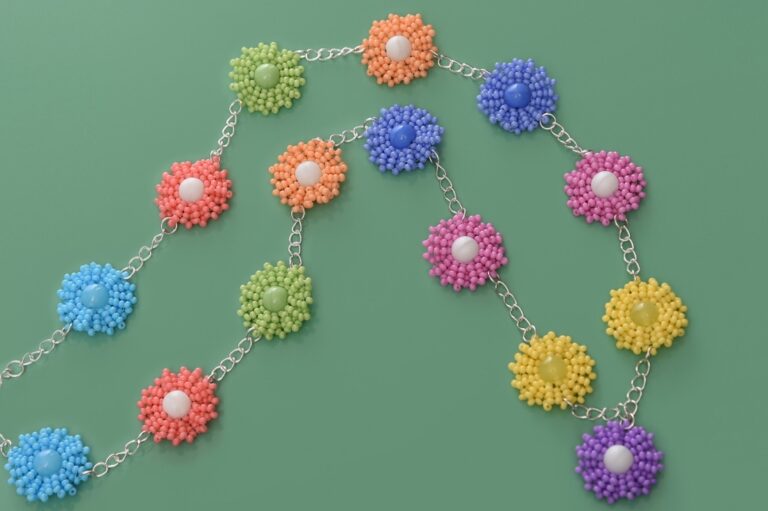
Project PDF is here Flower-Meadow Designer: Kerrie Slade Necklace...
The Project PDF Lucky Fringe Class Description Join us...

Project Step by step PDF is here: Scilla TECHNIQUE: ...
Join Danielle Wickes and learn to create an elegant,...
The Project PDF Petite Fleur Class Description In this...

CROCHETED BOWL FOR EASTER EGG PDF is here: crochet...
The Project PDF Crystal Hearts Jewelry Set Class Description...
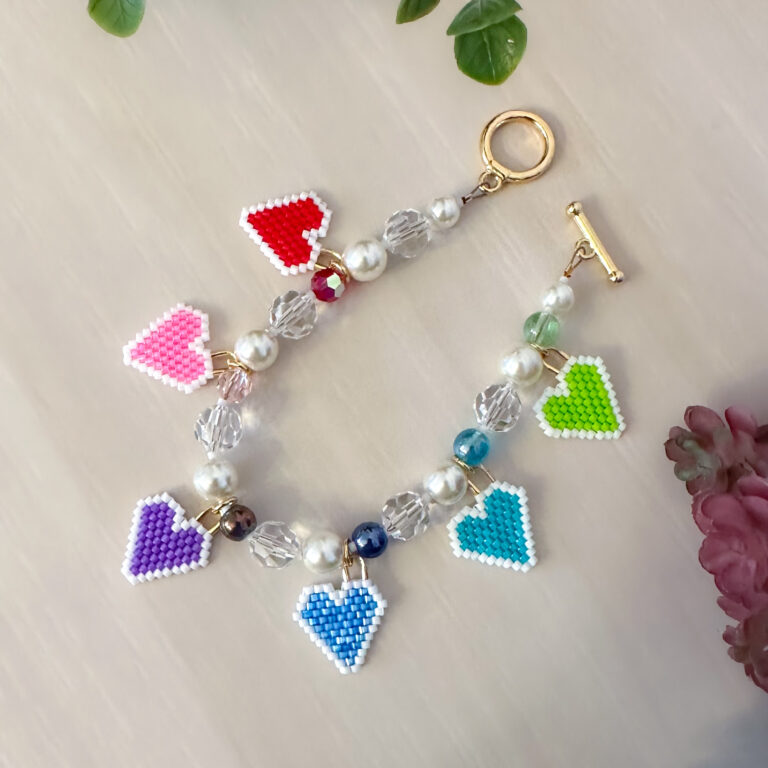
The Project PDF Heart Charm Bracelet Class Description Let’s...
Our New Products are ready to review in the...

LOVE Heart PDF Love heart Make a love heart...


