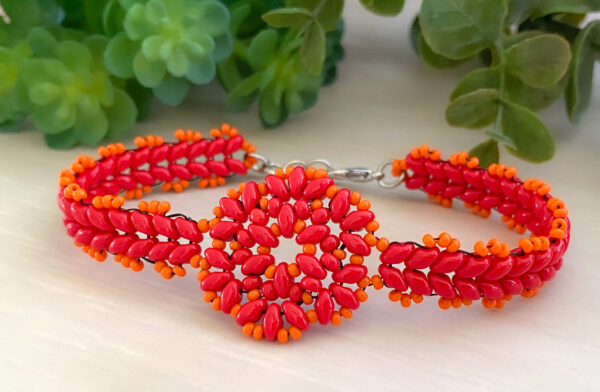

The video is a two hour PREMIUM beading tutorial hosted by Danielle Wickes for John Bead and Michaels Stores, where the main project is a Chrysanthemum bracelet. The versatile design allows for adjustments, letting the user create earrings, necklaces, and other jewelry items using similar techniques. The bracelet features a flower design that can be adapted and embellished based on personal preferences.
- Supplies:
- Seed Beads: Size 11 and 8 (in any color).
- SuperDuo Beads: Required for creating the flower pattern.
- Wildfire Beading Thread (0.06mm): Used for the stitching.
- Needles: Size 12 is recommended due to the tight weaving needed for the SuperDuo beads.
- Clasp Options: Lobster claws, jump rings, magnetic clasps, etc., can be used to finish the bracelet.
Bracelet Design Steps:
- Basic Flower Construction: The bracelet consists of a single flower made using seed beads and SuperDuo beads. It starts with creating a flat circular pattern, using alternating rows of beads and SuperDuo beads.
- Embellishment: Optionally, an extra round of smaller beads (size 11) can be added around the edges of the flower to create a more intricate, three-dimensional look.
- Variations: While the tutorial demonstrates a simple one-flower bracelet, it encourages viewers to experiment by creating multiple flowers and joining them for larger designs like necklaces or more complex bracelets.
- Customization: The user is free to embellish the flower differently, creating variations with or without added bead rows to change the overall look.
Tips:
- The bracelet is reversible, with both sides offering different aesthetics.
- It’s possible to change the number of beads in certain rows or adjust the embellishments to suit different styles or preferences.
- Reinforcement is important to make the bracelet sturdy, especially for wearable pieces.
Materials Handling:
- For those working with tight beads (especially SuperDuos), using size 12 needles or finer is helpful to ensure smooth weaving.
- Cutting the correct length of thread is crucial to avoid having to add new thread mid-project, which can be tricky.
Finishing:
- The bracelet can be finished by adding a clasp using jump rings or a magnetic clasp. Danielle demonstrates an easy way to attach the clasp, keeping the design adjustable.
The video is beginner-friendly but offers room for creativity, encouraging viewers to modify the design and personalize their creations.
Workshop Recording
Would you like to learn more?
The best way to learn about all our workshops and step by steps is by joining our Facebook Group:
Bead Projects and PDFs from John Bead
Danielle Wickes specializes in working with seed beads, bead-weaving, and looming, creating hand-knotted mala and yoga jewelry, crochet, and jewelry made with leather and wire. Danielle on Instagram linked here.
All of our classes for Michaels with links to patterns and recorded class on this blog are here.
