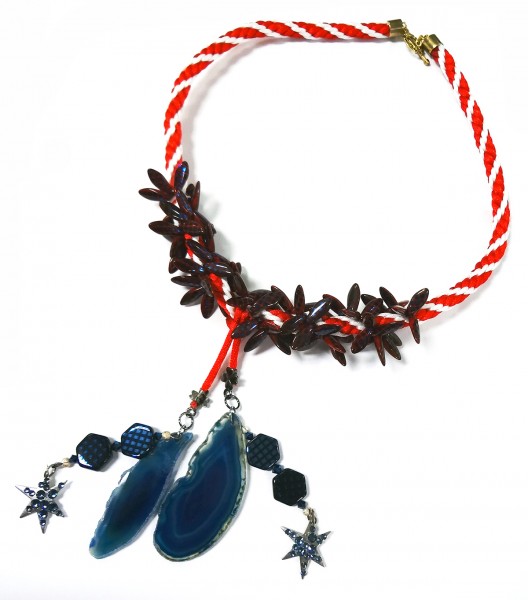
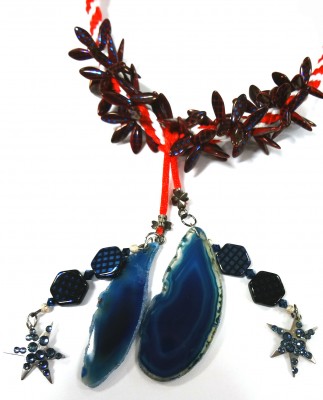
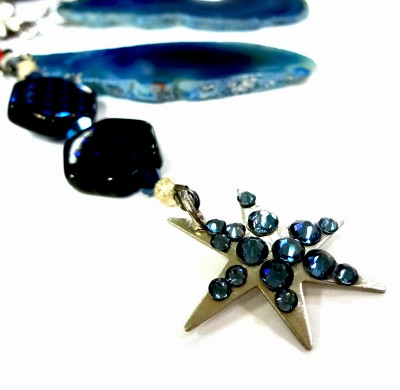
This is another of the wonderful samples you can see in person the John Bead showroom.
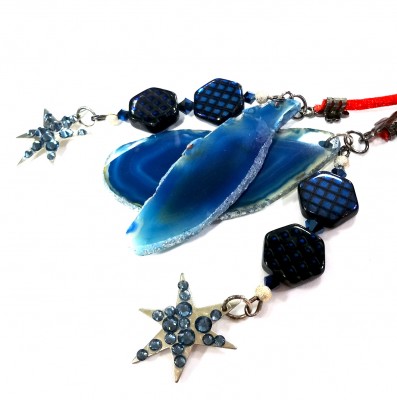
The agate slabs are beautifully showcased!
Design title: Warped Elegance Necklace
Mood: Summertime, wedding on a beach, art exhibition opening
Skill level: Intermediate
Duration: Aprox. 2 ½ hours
Material:
4 4mm dark indigo bicone crystal beads by Swarovski Elements
2 6mm dark indigo bicone crystal beads by Swarovski Elements
22 ss12 denim blue flat back chatons by Swarovski Elements
12 ss16 denim blue flat backs chatons by Swarovski Elements
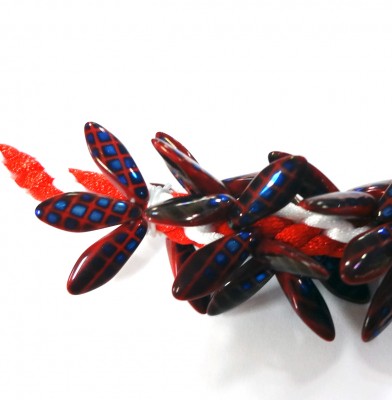
17x7mm glass red azuro peacock daggers
4 hexagon black azuro peacock beads
two teal blue agate slabs pendants
two 29mm plain silver 24ga star blanks by Metal Complex™
two gunmetal clover crimp ends
4 silver-plated wire guardians
4 silver-plated crimp tubes
4 silver-plated 4mm sparkle crimp covers
1ft 7strands .015’ blue Beadalon® stringing wire
1 ft 1mm clear stretching cord Elasticity™
4 silver-plated 8mm round jump rings
1 set of gold-plated Kumihimo findings
ft of 1.5mm white Dazzle It™ rattail cord
ft of 3 mm red/blue Dazzle It™ rattail cord
GS hypo cement
Tools:
Metal Complex™ hole punch, Side cutter, Flat nose, Round nose
Instructions:
1. Follow the package instructions to create a 18 inches Kumihimo braided necklace using 1.5mm white and 3mm red rattail cords by our Dazzle It™ line.
2. Use gel glue to secure gold-plated Kumihimo tube ends finishing off with antique gold-plated set of toggle. Set necklace aside.
3. Cut a 5-inch piece of stringing wire. String a crimp tube followed by a wire guardian and then back through tube. Crimp tube using standard crimp tool and then cover it using a crimp cover, and then trim short end of wire.
4. String components onto stringing wire as follow:
3mm bicone, hexagon peacock, 6mm bicone, peacock hexagon, 3mm bicone
Finish this section on same fashion done on the opposite end. Create a second beaded section like this and set them aside.
5. Open a 6mm jump ring and then attach to hole of one agate slice followed by a beaded section done on steps 3-4, and then close jump ring gently. Repeat with second agate slice and set them aside.
6. Use punch hole pliers to create a hole at the far end of one of the points of a silver star blank making sure the hole is centered. You can use a sharper pen to create a dot so pliers can be placed right on top of it. (use our picture as guidance)
Repeat the same to punch second star blank.
7. Randomly place small dots of gel glue on top of star blank and then begin gluing crystal flat backs immediately after. You can glue ss16 stones in the center and use small stones to ornate the points of the star.
Cover surface of second star on same fashion and set aside.
8. Find the center of your braided necklace, and then fold a four inches piece of red rattail. Pass it over braided section and then passes both ends over its circle and pull both ends down, leaving one cord ends smaller than the other.
9. Slide one of the tips of the cord ends to crimp cord making sure loop is facing outside end of cord. Gently squeeze the sections of back tube of crimp end using flat tip end of standard crimp tool. Trim any excess of rattail cord flush with squeezed section.
10. Open a jump ring and then attach to one agate dangle made on step 5 and then close it gently. Repeat the same to add second agate dangle to other end of rattail cord.
11. Place a double overhand knot at far end of a 10 inches length of a Elasticity cord. Begin feeding 80 red azuro dagger beads onto the cord.
12. Wrap one of the ends of stretching cord 3-inch away from center of necklace (use dangle as your start point). Place a tight double knot around this section, and then start wrapping daggers and stretching the cord to create exposed spaces throughout the area but still leaving the Kumihimo visible.
13. Add a dab of stringing glue on top of each knot placed on each end of stretching cord. Let it sit for few minutes and then trim excess.
14. Open a jump ring and attach one start through wire guardian loop on the bottom of each final ends of beaded section of agate dangle.
Designer’s tip:
* You can edit this design incorporating only the agate slices dangles to its middle section.
* Or you can also cover the entire braided necklace with stretched dagger strands or reduce it to only middle section without agate slices.
* For ultra glamorous look try a black and silver Kumihimo version covered only by metallic daggers from end to end. That will provide you a strong subtle version of the design with a dramatic allure.

Fernando has created many pieces of jewelry which are displayed in the John Bead showroom. Some of these designs appear in our catalogues and may have been published. For those of you who can’t visit in person we will have a regular post on this blog giving you a closer look at the finished jewelry. Fernando has written all the instructions and is sharing them with you. Welcome to the series we call: Fernando DaSilva’s Atelier.
