Natalie Foidart sent us this step-by-step showing us how she applies jingle cones to a dress. Read more about how she supported her daughter’s dream to design a new jingle cone here.
The completed dress features the copper jingle cones. We also have nickle cones & brass.
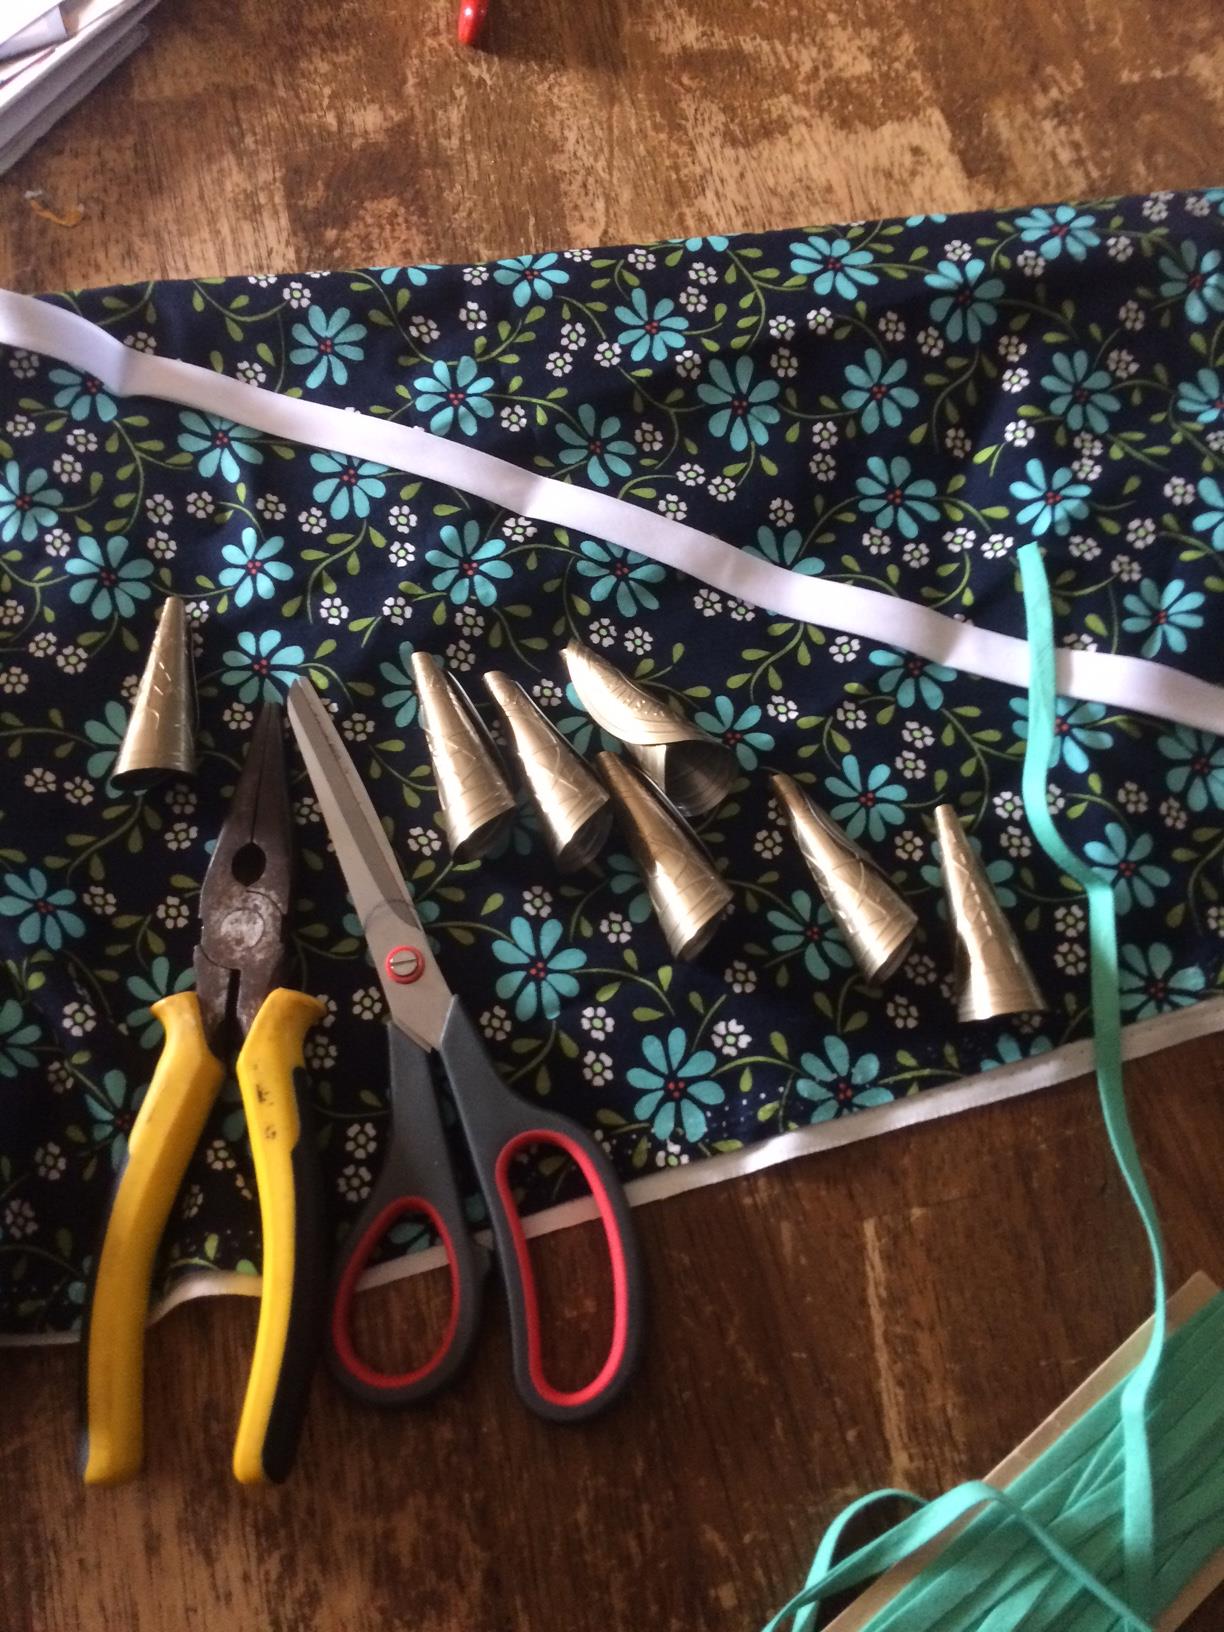
Step 1 – Review Tools and material needed (minus sewing machine)
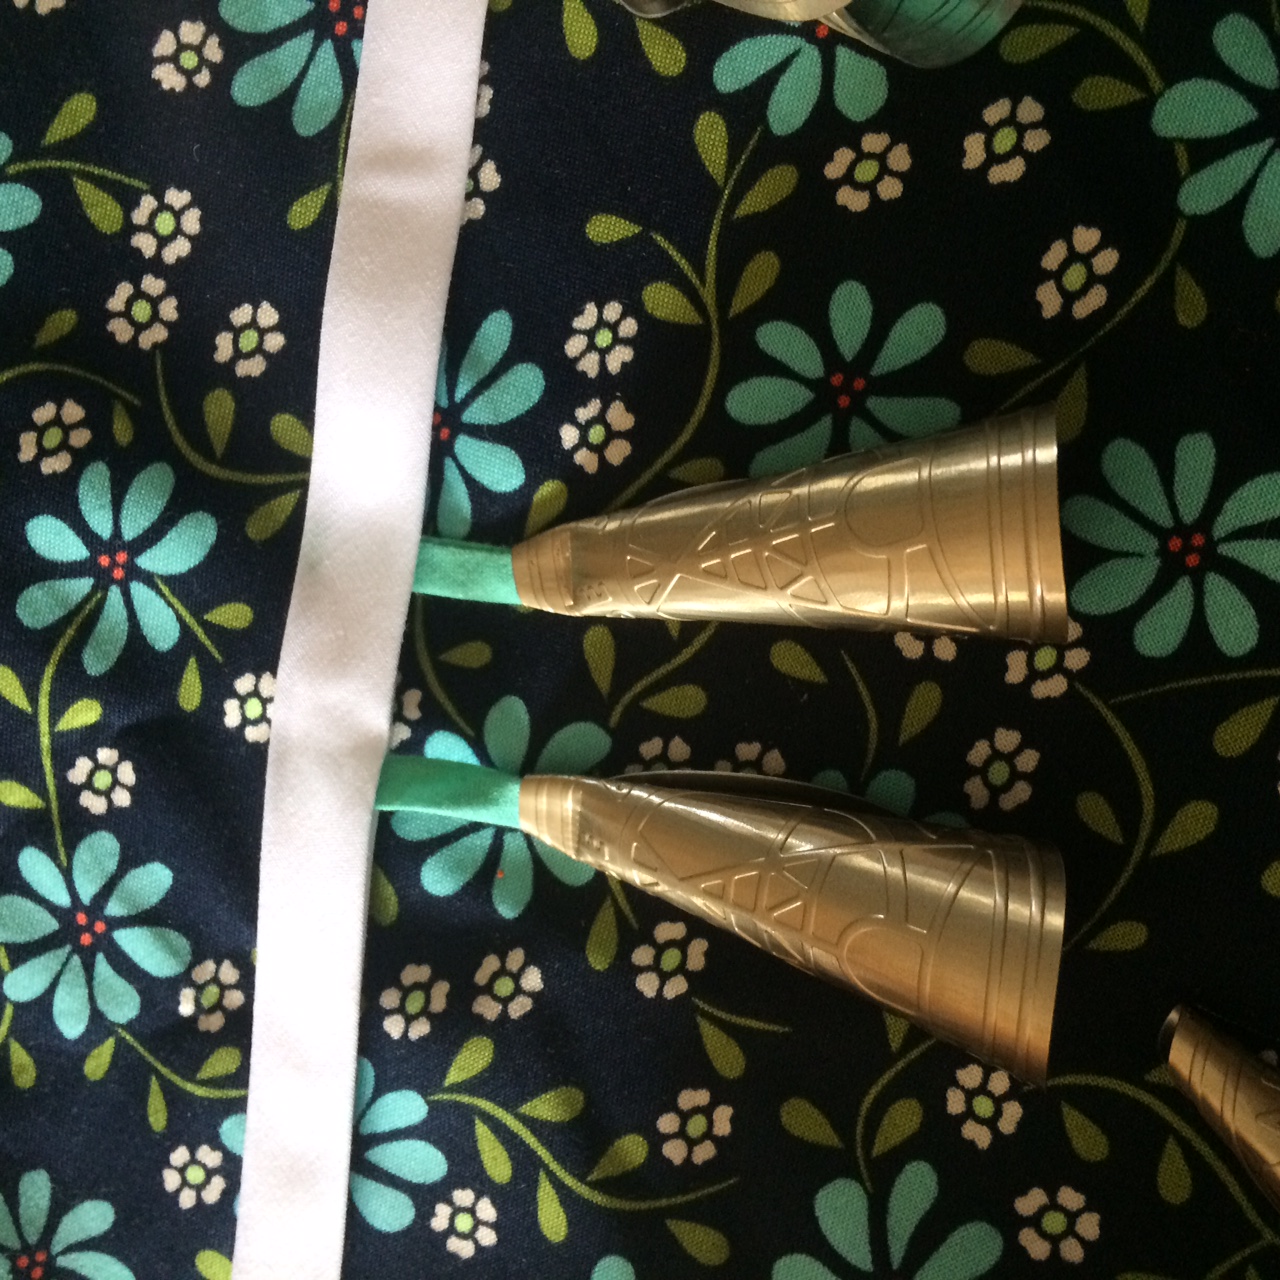
Note there are two sizes of bias tape. The teal tape is used first and the white bias tape shown creates the striping you see on the dress.
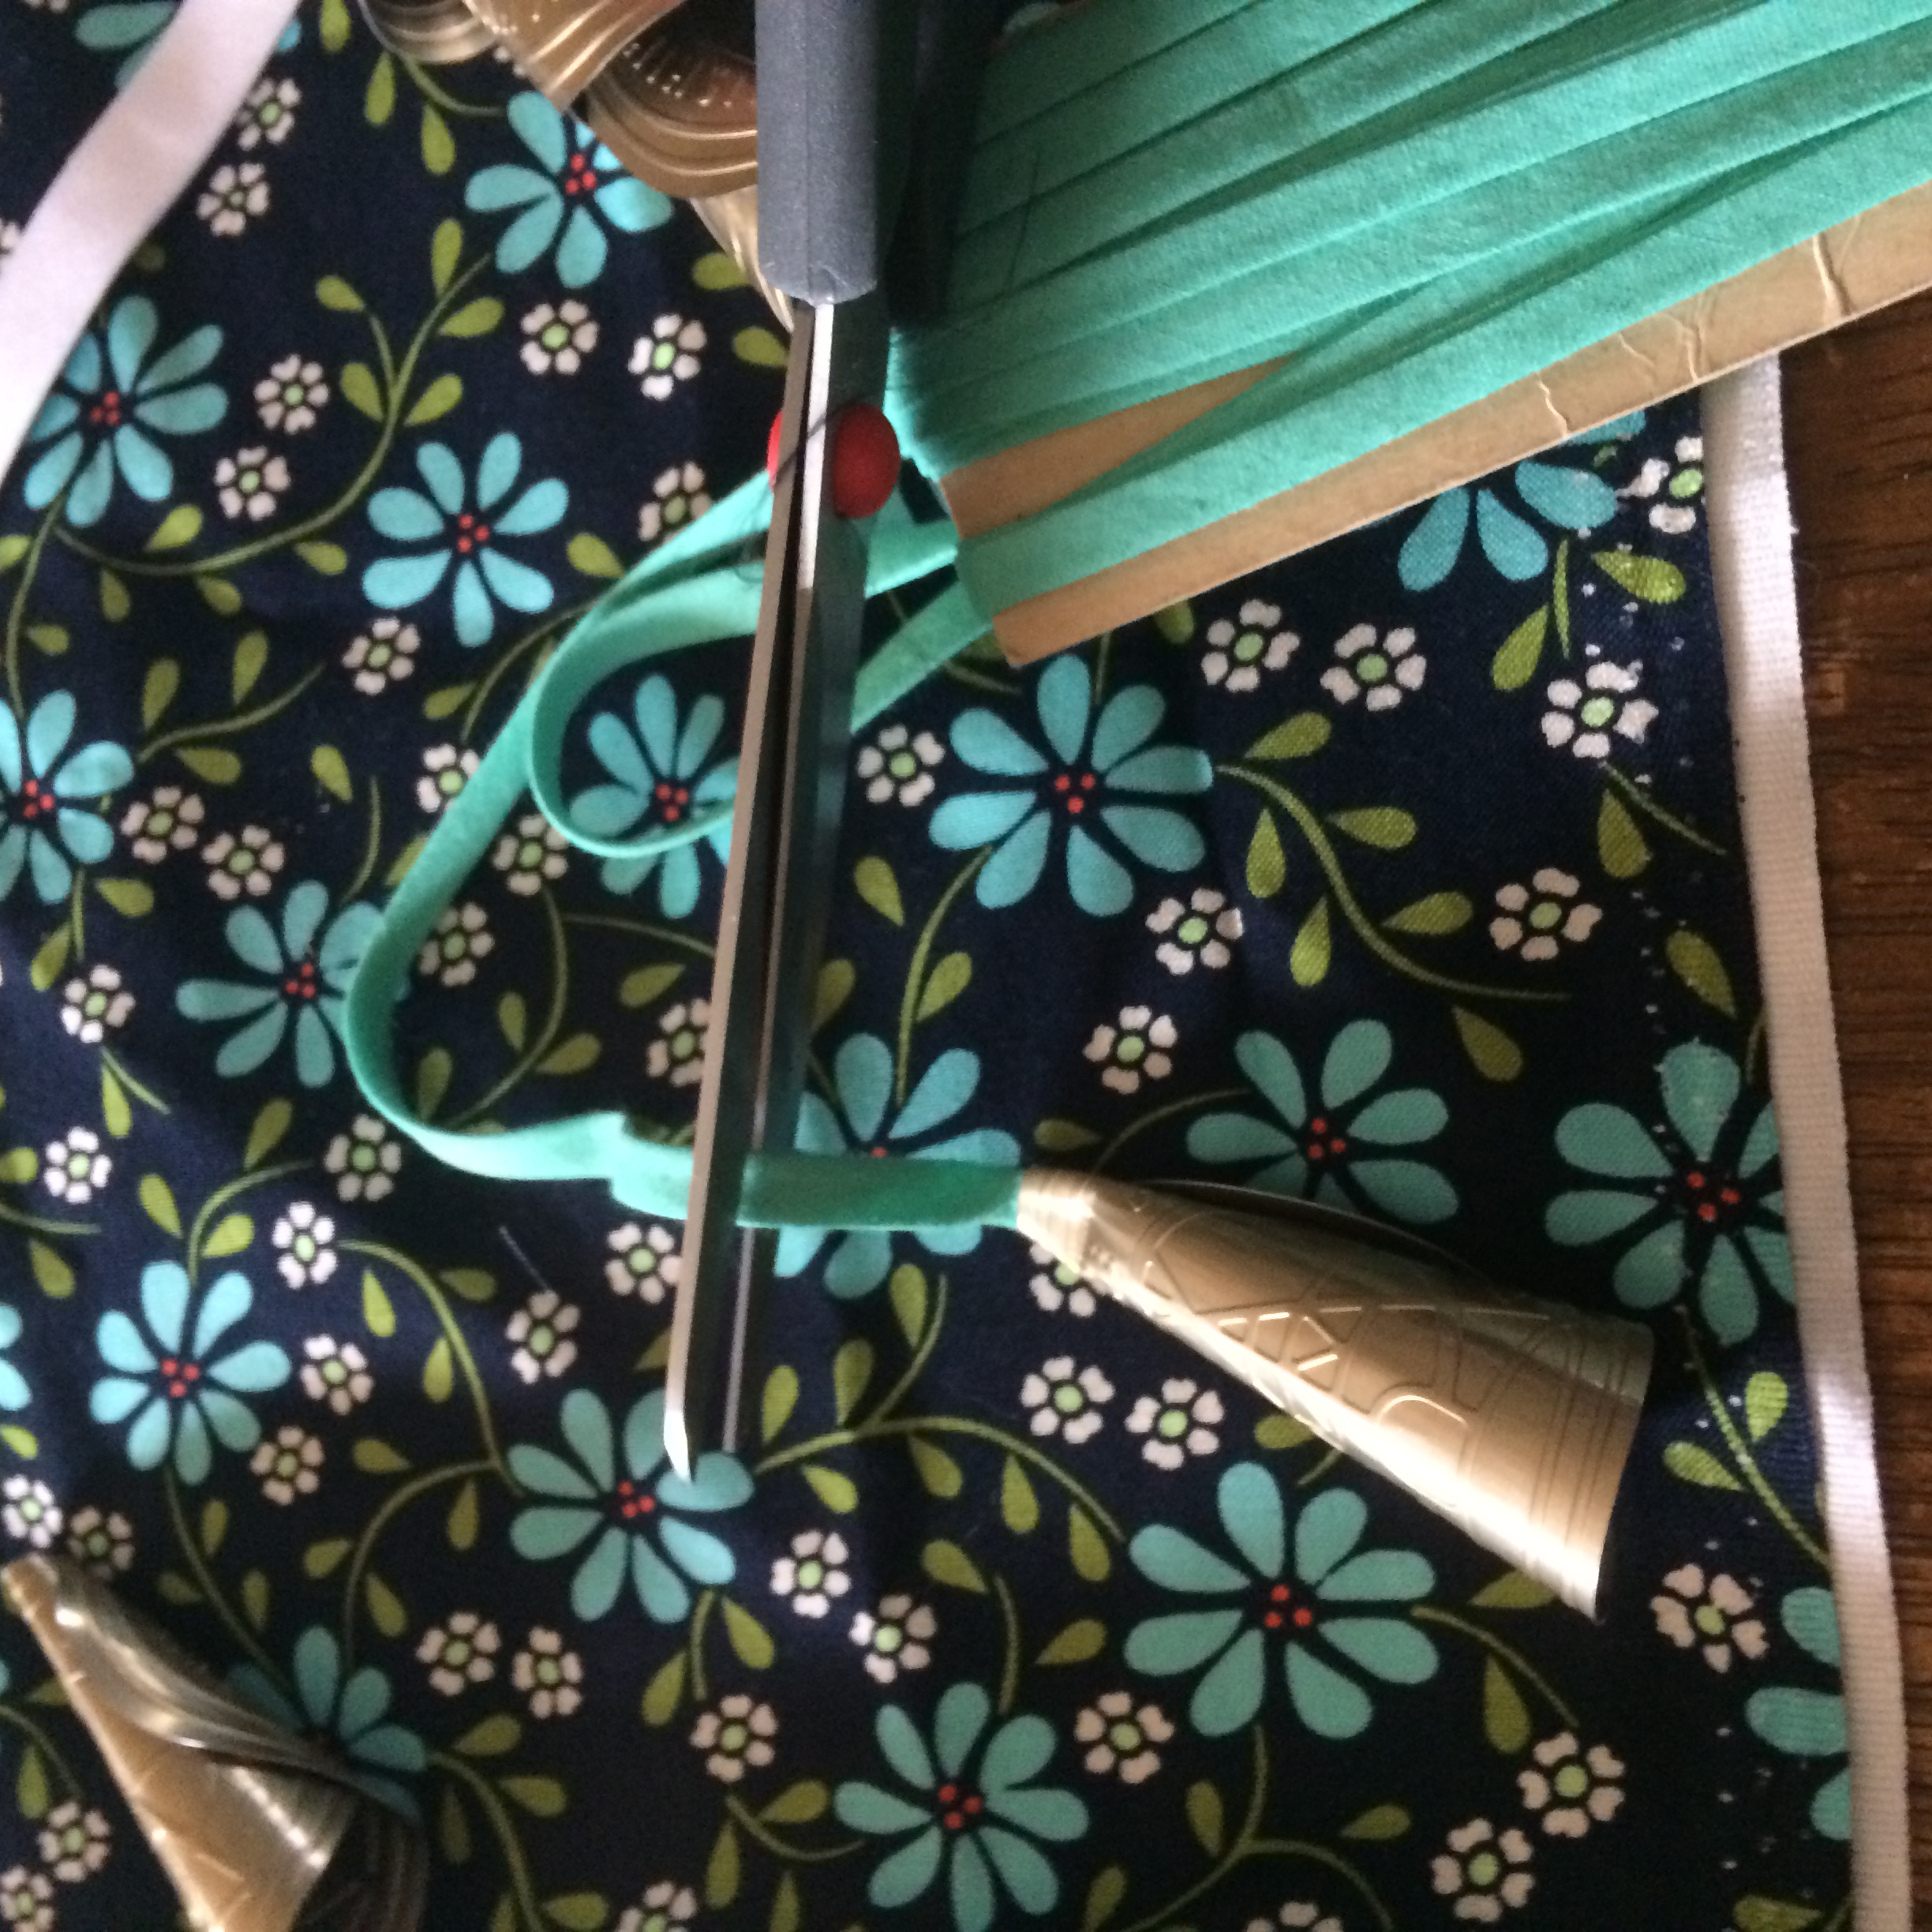
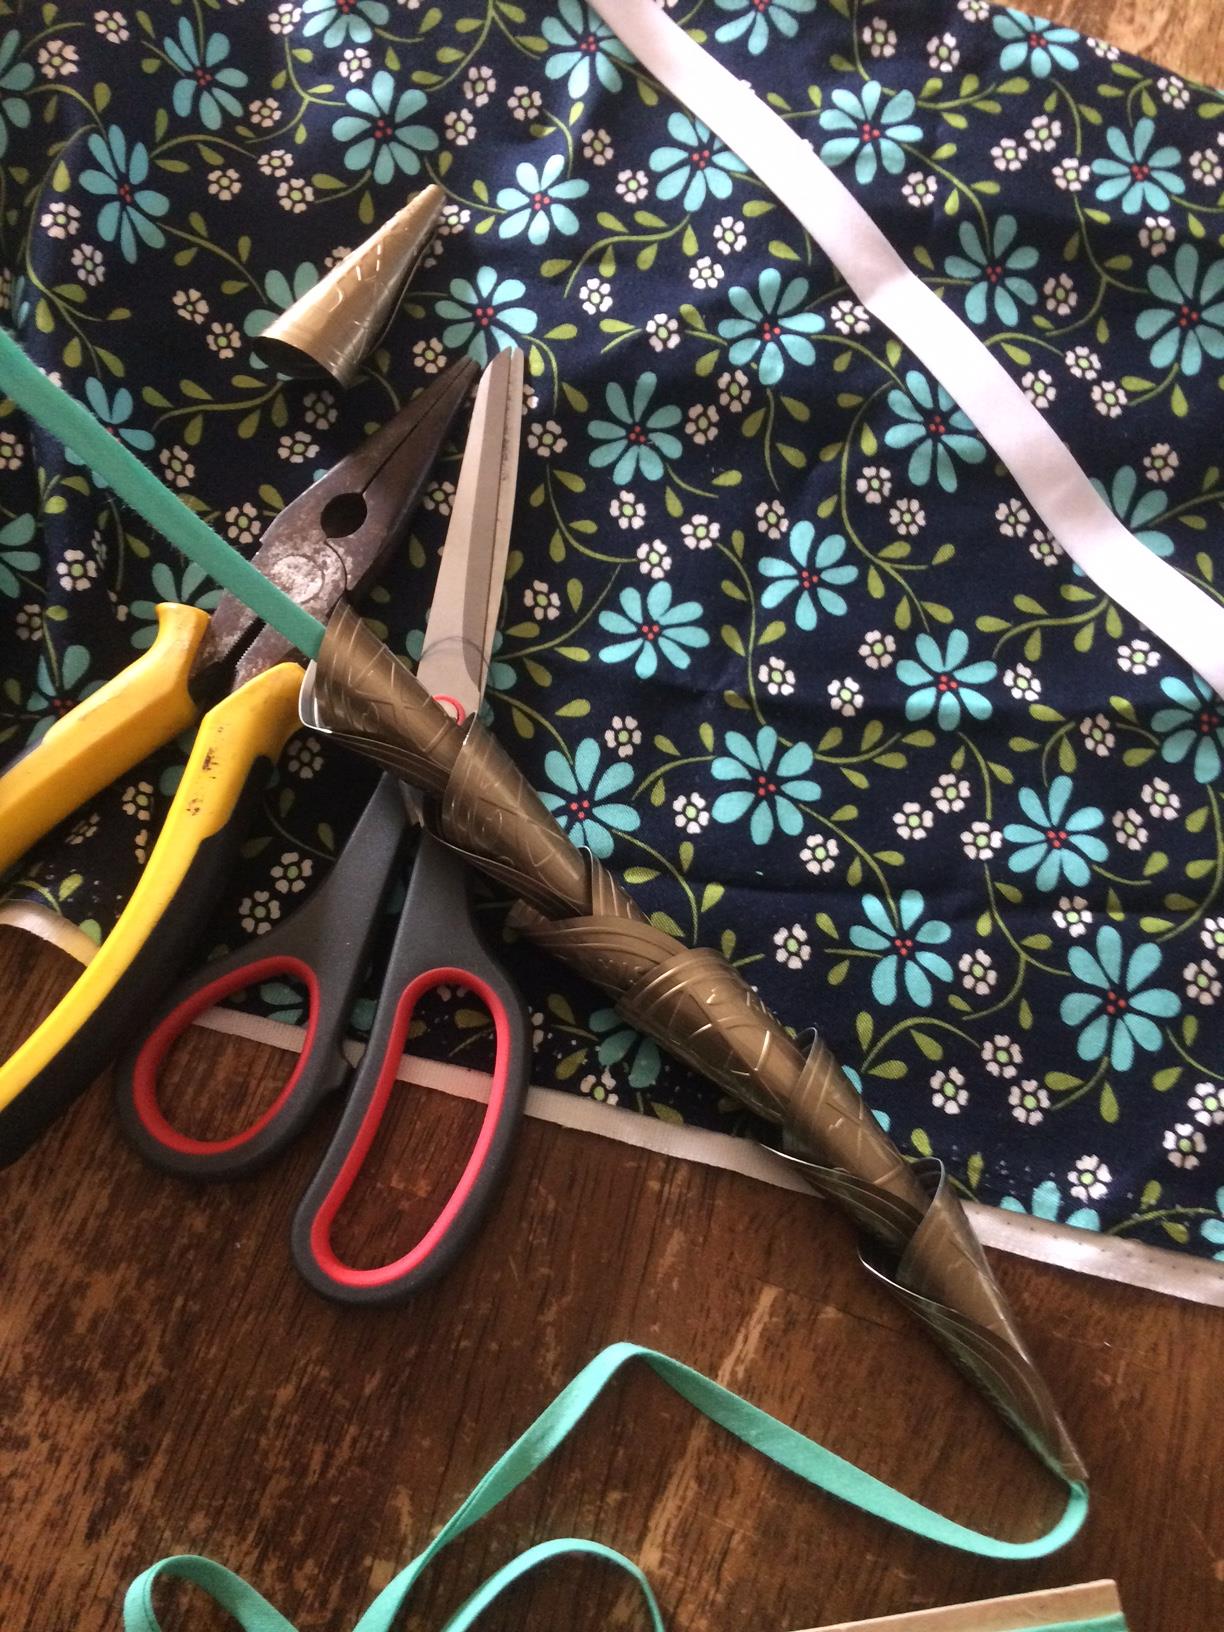 Step 2 – String 4-6 cones on bias tape.
Step 2b – Make a knot at the bottom end of bias tape.

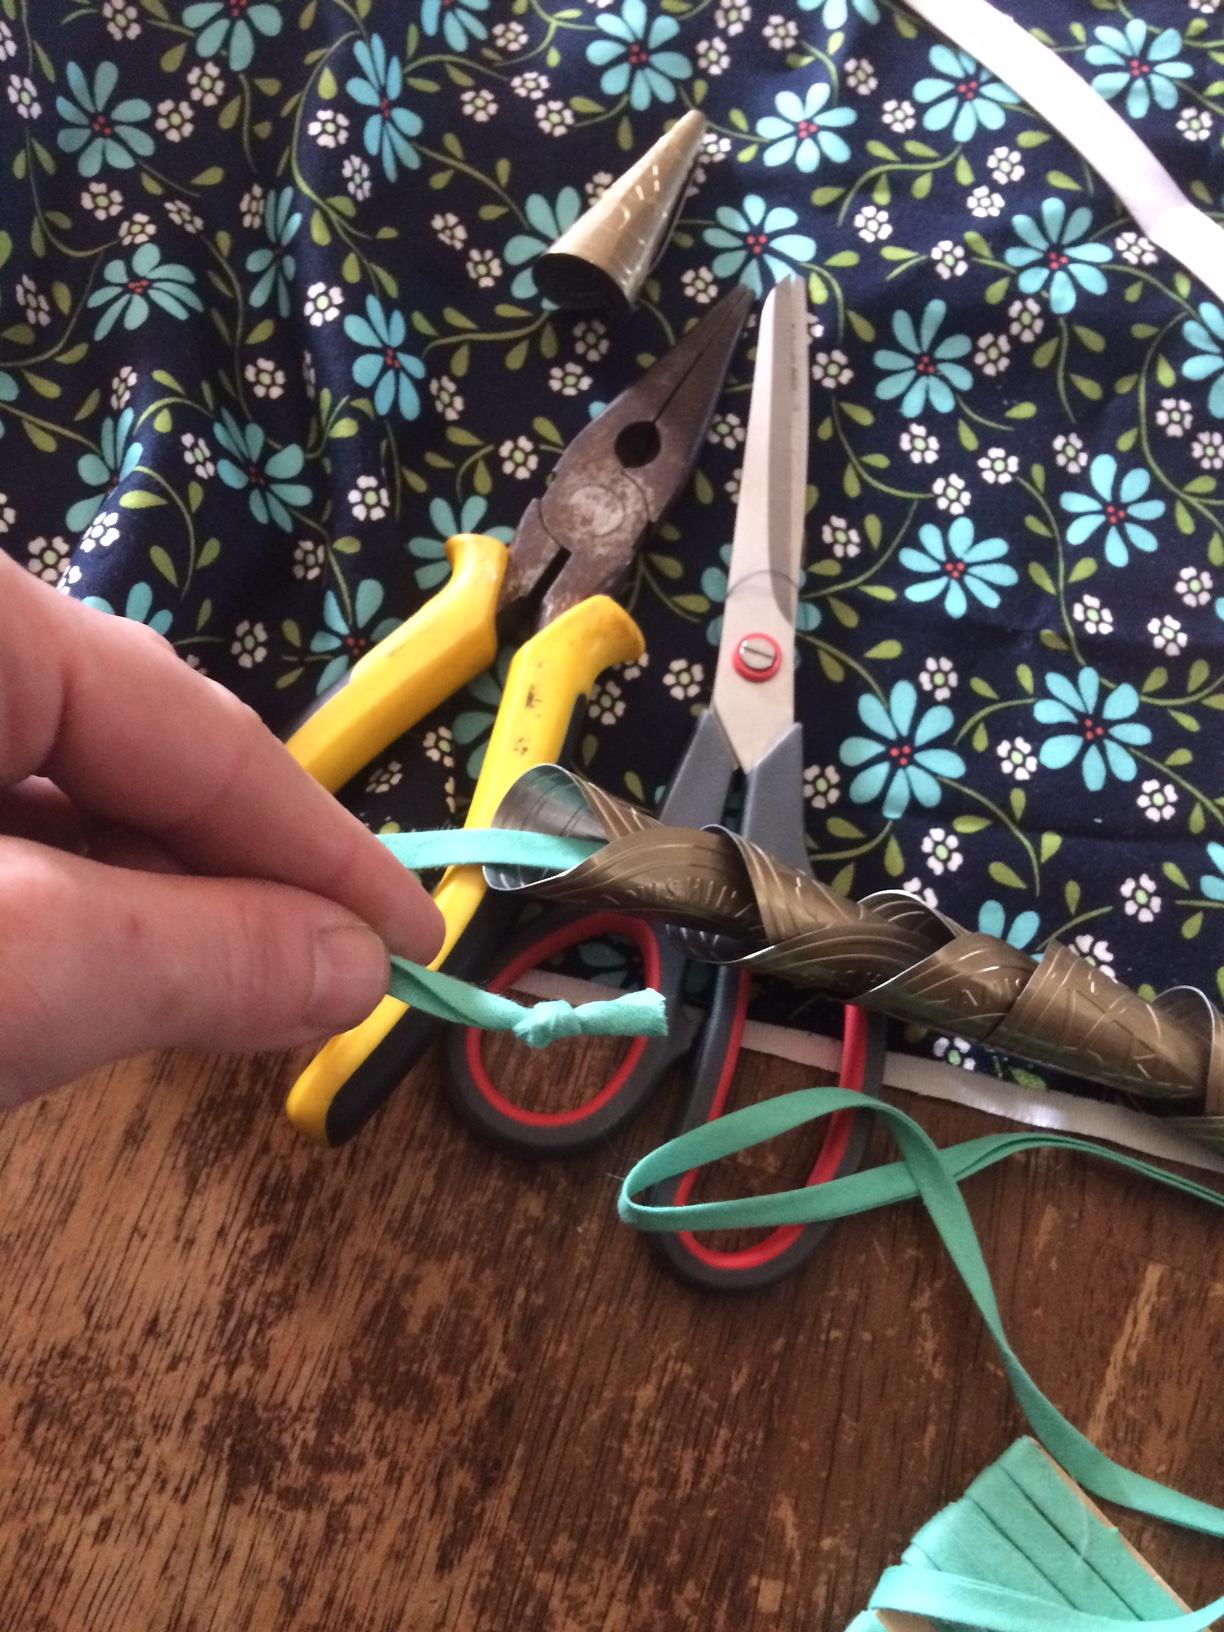
Step 3 – Then slide one cone down until it reaches knot.

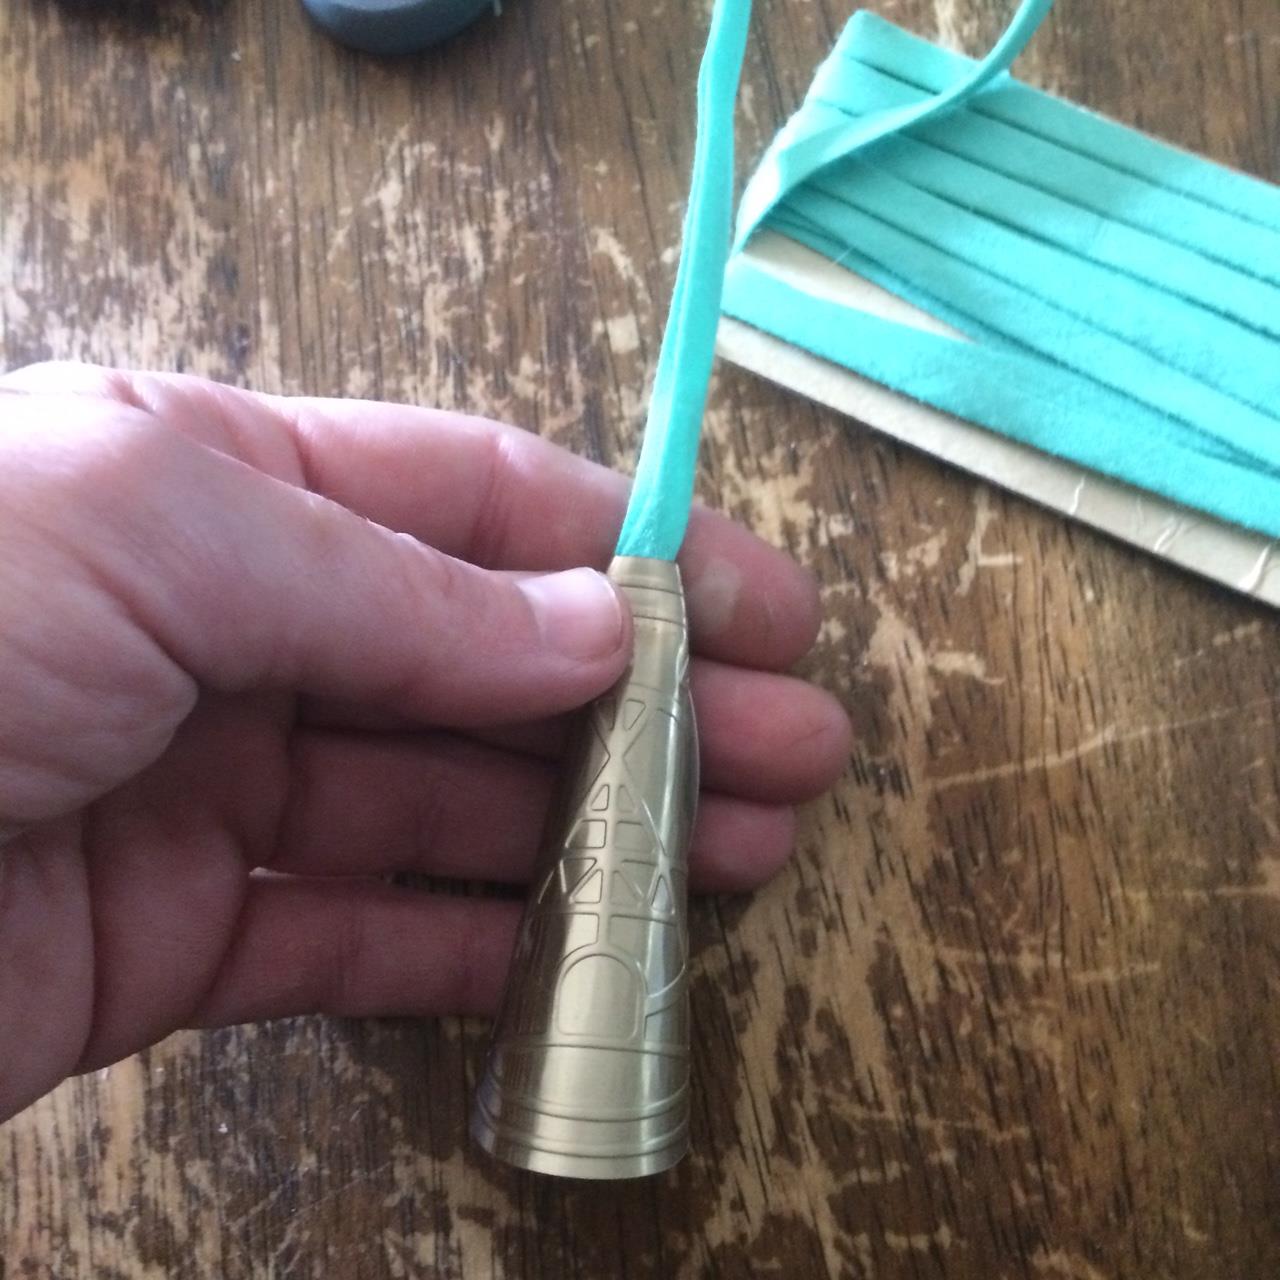
Step 4 – Crimp top of cone with a pair of needle nose pliers.
Step 5 – Leave about an inch of bias tape showing or whatever your preference is, (some like them to hang longer or shorter).
Step 6 – Cut the bias tape at the top end of the cone with scissors.
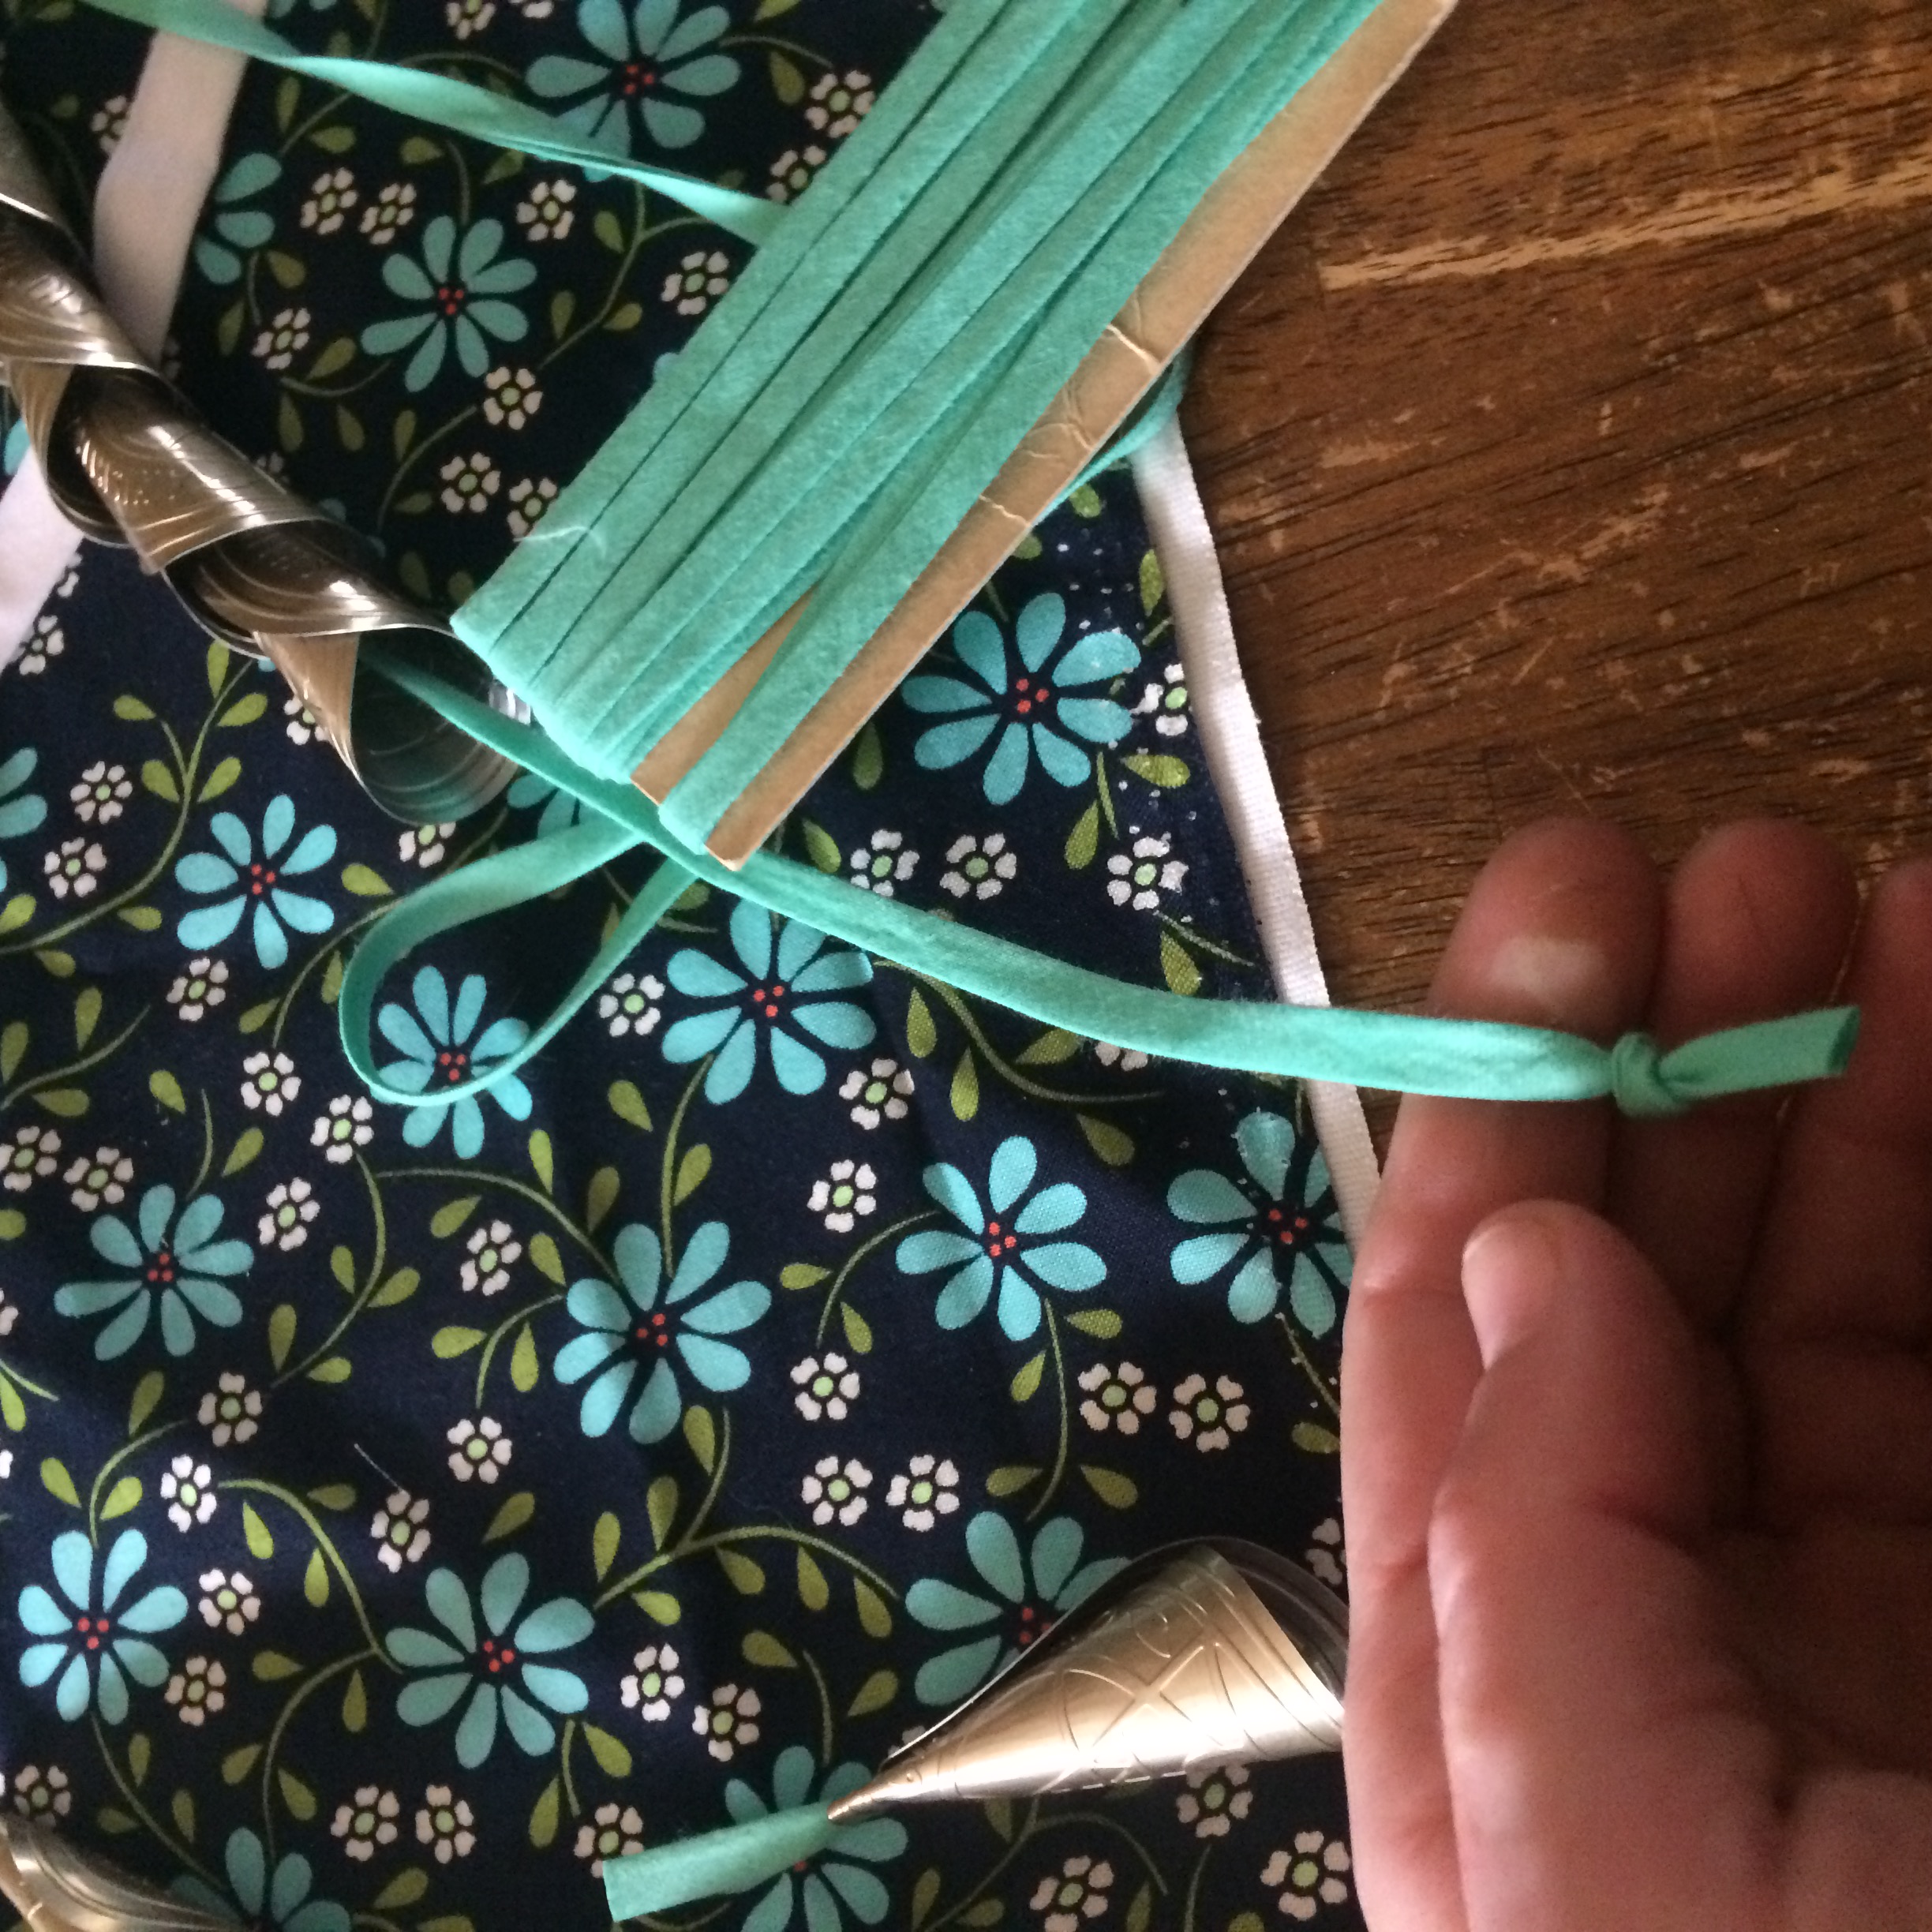 Step 7 – Tie a new knot at the bottom of your bias tape string with cones on it and repeat step 1-6

Step 8 – After you have a few of them done, insert them in your wider bias tape (already attached to the dress). I used heat and bond to attach the wider bias tape to the dress first and I also put a strip on the inside of the tape where I placed the tabs of the jingle cones I’ve just created. I usually space them out an inch to an inch and a half apart depending on how heavy I would like the dress to be.
Step 9 – Fold the bias tape over, iron and sew it down once a whole length is completed.
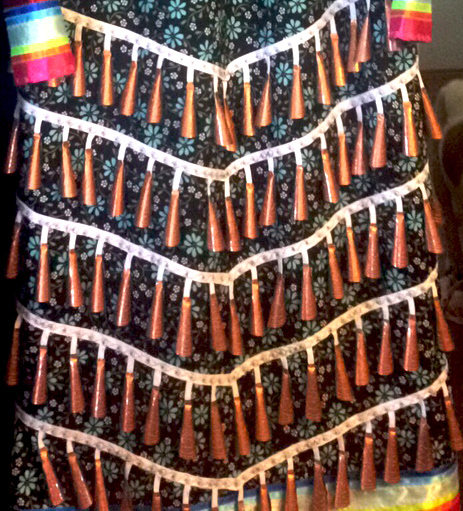
Make as many rows are you desire!
![]()